Ugh I'm late with this again. But in my defense, on Sunday we had a cookout and on Monday, we went out to dinner for my birthday, and then all day yesterday I was at IKEA. I was completely exhausted when I got home so writing a post was not a priority.
I'll make up for it with two recipes today.
Brown Sugar Carrots
Prep Time: 10 min. Cook Time: 40 min. Servings: 4
Ingredients:
4 carrots, peeled and sliced thinly
1-2 TB olive oil
2 TB brown sugar
salt to taste
Directions:
Preheat oven to 400 degrees. Place carrots in a mixing bowl and drizzle with olive oil. Toss well to coat. Sprinkle brown sugar over carrots and toss again to coat. Line a cookie sheet with tin foil (for easy clean up) and spray with olive oil spray. Spread carrot slices out in a single layer. Sprinkle salt over the top, if desired. Place in oven and bake for 20 min. Stir and flip carrots. Bake for 20 more minutes or until carrots start to brown.
Review:
So I kinda made this recipe up. I saw a recipe online for carrot fries. They were pretty good; tasted like sweet potato fries, but they were kind of mushy. So the next night, I busted out my mandolin (which if you don't own one, go get one! You can get one at Bed, Bath, & Beyond for a total of $15 if you have a 20% off coupon) and sliced the carrots very thin. I used brown sugar because I know that's something people will often put on their sweet potatoes so I figured they would go well with carrots. And even though I made these more for the girls, Walker and I ended up eating them! The girls turned their noses up at them (go figure) but Walker and I thought they were really, really good. I liked the addition of the salt, especially.
Lemon Chicken with Spinach Pasta
Prep Time: 15 min. (+30 min. to 8 hours for marinading) Cook Time: 30 min. Servings: 4
Ingredients:
1 pound boneless, skinless chicken breasts
1 small onion, sliced thin
1 lemon, zested and juiced
3 TB white wine vinegar or rice-wine vinegar
1 TB olive oil
1/4 tsp salt
1/4 tsp white or black pepper
8 oz whole-wheat penne
4 cups spinach, washed and trimmed
Directions:
Prepare a glass baking dish with nonstick cooking spray. Trim the chicken of any remaining fat. Place chicken between two sheets of plastic wrap or parchment paper and use a meat mallet, rolling pin, or the bottom of a heavy pan to pound the meat until it is 1/2- to 3/4- inch thick. Slice each breast into four strips and place into the prepared baking dish. Sprinkle the sliced onions over the chicken.
Prepare the marinade. In a mixing bowl, whisk together the lemon zest, lemon juice, vinegar, oil, salt, and pepper. Pour half the mixture over the chicken and onions and reserve the second half for the sauce. Marinate in the refrigerator for 30 minutes or up to 8 hours.
Preheat oven to 350 degrees. Cover chicken and onions with foil and bake for 30 minutes.
While the chicken is cooking, cook the pasta according to package directions until al dente. Reserve 1/4 cup of the pasta water before draining the pasta. Return the pasta and the reserved pasta water to the pan. Add the spinach, cooking until it wilts. Add the reserved marinade mixture and heat just until warm. Serve with cooked chicken.
Nutrition:
Calories: 353.6
Fat: 6 g
Carbs: 47 g*
Fiber: 8.1 g
Protein: 34.4 g
Review:
This recipe comes from my new SparkPeople Cookbook. I don't know if you've heard of SparkPeople but it is a free website that lets you track calories (and fat, protein, carbs, fiber, etc.) along with your workouts, weight, water intake...basically anything you can think of. It really is a wonderful community for people focusing on making healthier choices. Anyway, I ordered the cookbook last week and this is the 2nd recipe we tried. I must say, it was pretty tasty. I know it looks like I put a pound of Parmesan on it but I swear I didn't put that much. And truthfully, this dish doesn't really need the Parmesan cheese on it. I just like cheese. :) Sometimes pasta dishes can leave you feeling like a complete blob, but this dish was really light and refreshing in taste. One serving was perfectly satisfying without making me feel like I overate. It is a perfect pasta dish for summer!
*There is a brand of pasta (cannot remember the name but I know Meijer sells it and it comes in a black box) that only has 5 g net carbs per serving. We use that kind because it is better for Walker. The nutritional information above is right from the cookbook, so it should be accurate if you use a regular whole-wheat pasta.
Wednesday, August 1, 2012
Tuesday, July 24, 2012
Tuesday Temptations
My life is so exciting that I forgot it was Tuesday. Okay, not really.
Only one recipe for you this week, but I think you'll like it.
Mexican Chicken
Prep Time: 5 min. Cook Time: 20-30 min. Servings: 4
Ingredients:
1 pound chicken breast, cubed
1 packet taco seasoning
1/2 cup enchilada sauce
4 oz shredded cheddar cheese
green onions to garnish
Directions:
Preheat oven to 350 degrees. Place chicken pieces into plastic bag with taco seasoning. Toss to coat. Saute chicken until mostly done. Place chicken in greased 8x8 casserole dish. Add the enchilada sauce and toss to coat the chicken. Sprinkle cheese evenly over the top. Bake for 10-20 minutes or until cheese is melted and bubbly. Sprinkle with green onions.
Review:
Now I modified this recipe slightly from the original. The original recipe calls for only 1 tsp. of taco seasoning. Also, it says to saute the chicken before you cut it up. However, I highly disagree with only 1 tsp of taco seasoning. I mean, if I'm going to open a packet of seasoning, I will use the whole packet thank you very much. Also, by cutting up the chicken before sauteing it (and using a plastic bag to shake it all up) you are ensuring more surface area of chicken gets coated with taco seasoning, resulting in higher flavor.
In terms of ease, it doesn't get much simpler than this recipe. The prep work is minimal and you don't have to keep a close eye on it once it's baking.
I served this over black bean quinoa and it was delicious. If you haven't tried using quinoa as a rice substitute yet, I highly recommend it. It is expensive (expect to pay almost $5 for a 1 lb bag at Meijer) but it is incredibly good for you and I really like the taste and texture of it.
Also just wanted to add, if you're not growing your own green onions on the window sill yet, do it! I saw it on Pinterest when I first joined and I was skeptical, but it really does work. When you get a bunch of green onions, chop them up but save the bulbs/roots. Plunk them in a glass of water and keep it in a place that gets lots of light. Then, whenever you need some green onions, just snip some of the shoots off. As long as you don't destroy the bulbs, the shoots will keep regenerating and you'll never have to buy green onions again!
Only one recipe for you this week, but I think you'll like it.
Mexican Chicken
Prep Time: 5 min. Cook Time: 20-30 min. Servings: 4
Ingredients:
1 pound chicken breast, cubed
1 packet taco seasoning
1/2 cup enchilada sauce
4 oz shredded cheddar cheese
green onions to garnish
Directions:
Preheat oven to 350 degrees. Place chicken pieces into plastic bag with taco seasoning. Toss to coat. Saute chicken until mostly done. Place chicken in greased 8x8 casserole dish. Add the enchilada sauce and toss to coat the chicken. Sprinkle cheese evenly over the top. Bake for 10-20 minutes or until cheese is melted and bubbly. Sprinkle with green onions.
Review:
Now I modified this recipe slightly from the original. The original recipe calls for only 1 tsp. of taco seasoning. Also, it says to saute the chicken before you cut it up. However, I highly disagree with only 1 tsp of taco seasoning. I mean, if I'm going to open a packet of seasoning, I will use the whole packet thank you very much. Also, by cutting up the chicken before sauteing it (and using a plastic bag to shake it all up) you are ensuring more surface area of chicken gets coated with taco seasoning, resulting in higher flavor.
In terms of ease, it doesn't get much simpler than this recipe. The prep work is minimal and you don't have to keep a close eye on it once it's baking.
I served this over black bean quinoa and it was delicious. If you haven't tried using quinoa as a rice substitute yet, I highly recommend it. It is expensive (expect to pay almost $5 for a 1 lb bag at Meijer) but it is incredibly good for you and I really like the taste and texture of it.
Also just wanted to add, if you're not growing your own green onions on the window sill yet, do it! I saw it on Pinterest when I first joined and I was skeptical, but it really does work. When you get a bunch of green onions, chop them up but save the bulbs/roots. Plunk them in a glass of water and keep it in a place that gets lots of light. Then, whenever you need some green onions, just snip some of the shoots off. As long as you don't destroy the bulbs, the shoots will keep regenerating and you'll never have to buy green onions again!
Tuesday, July 17, 2012
Tuesday Temptations
Time for another edition of Tuesday Temptations (and it's still Tuesday!!)! I feel like a theme song should be playing.
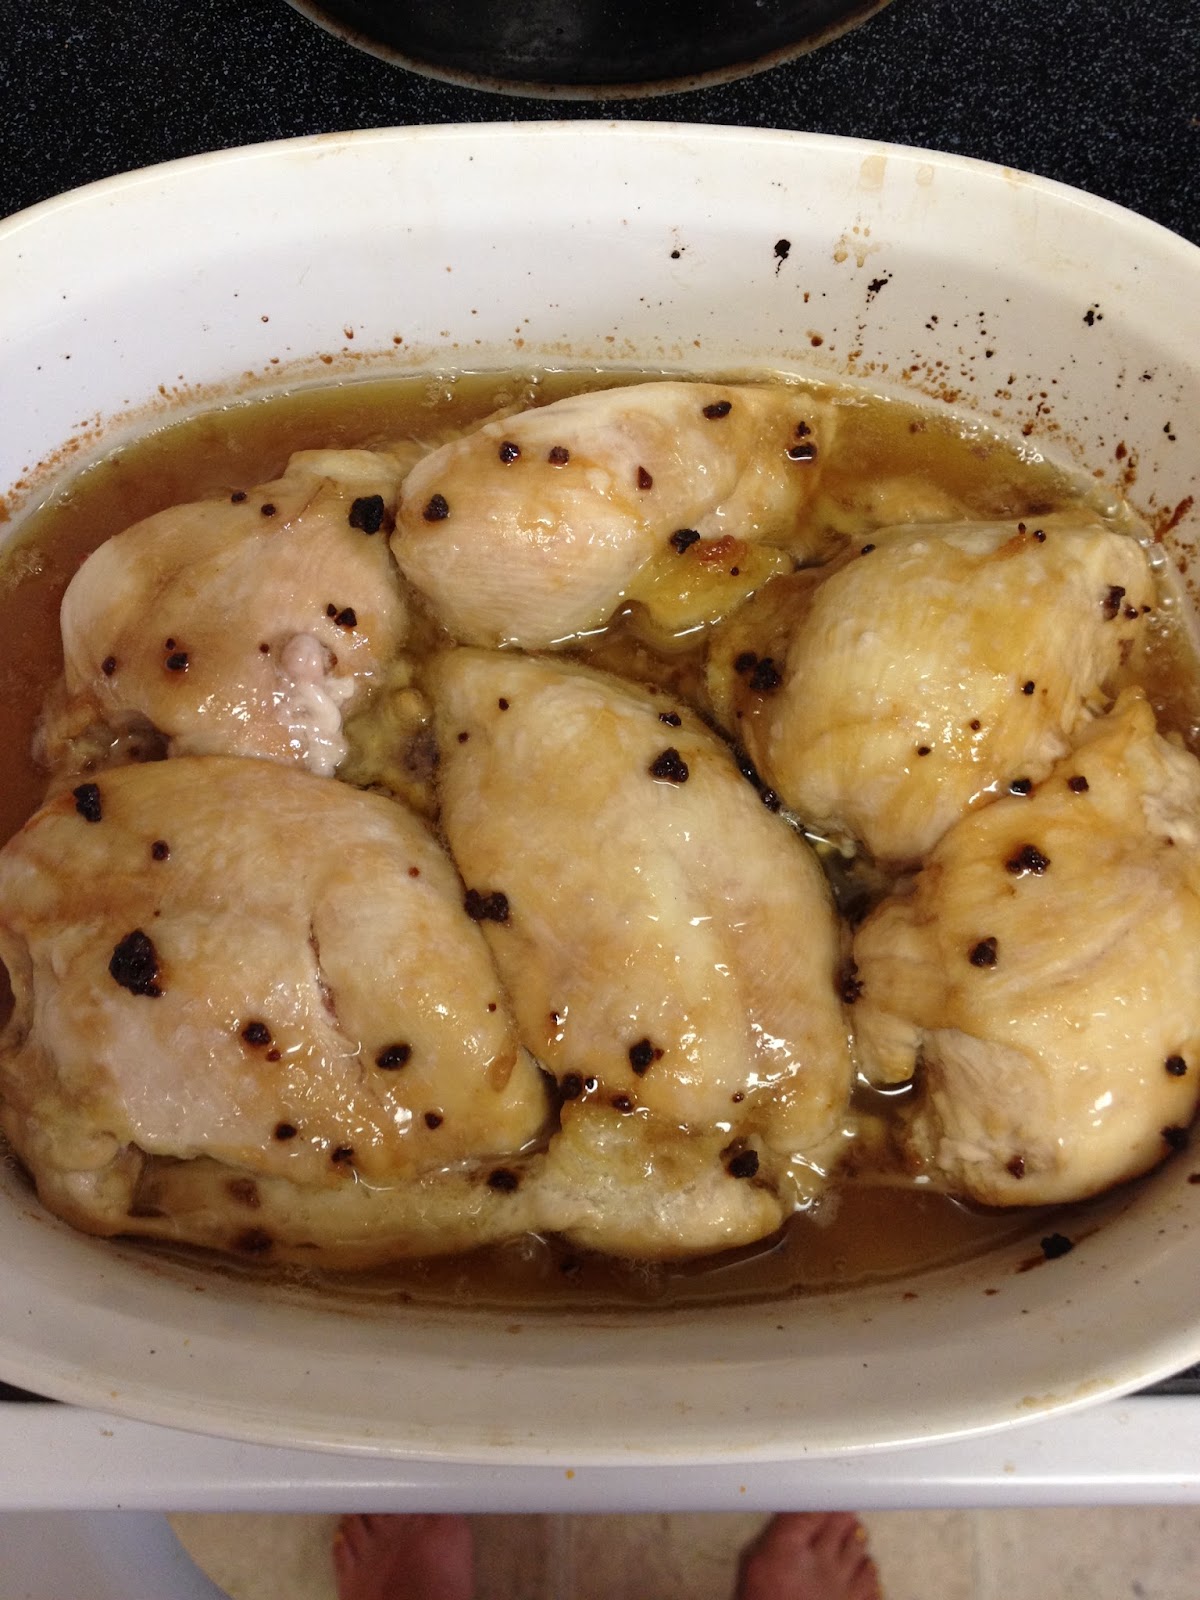
This week I bring you Easy Garlic Chicken and Zucchini Fries. Both recipes come courtesy of Pinterest.
Easy Garlic Chicken:
Prep Time: 10 min. Cook Time: 20 min. Servings: 4
Ingredients:
4 boneless skinless chicken breasts
4 garlic cloves, minced
4 Tbs. brown sugar
3 tsp. olive oil
Directions:
Preheat oven to 500 degrees. Lightly grease a casserole dish. In a small saute pan, saute the garlic in the oil until tender. Remove from heat and stir in brown sugar. Place chicken in casserole dish and cover with the garlic and brown sugar mixture. Add salt and pepper if desired. Bake uncovered for 15-30 min. (we baked ours for 20).
Nutrition:
Calories: 221
Fat: 6.4 g
Carbohydrates: 14.5 g
Fiber: 0 g
Protein: 25 g
Review:
Well the chicken was very easy to make and I love that we really didn't even have to buy anything for this recipe considering we keep all 4 ingredients on hand at our house. However, it was lacking in flavor a bit for me. The chicken was juicy enough but it was kind of bland. I'm pretty sure when we eat the leftovers tonight I will be adding some BBQ sauce to mine. I'm not sure we will be making this again, unless we are in a bind or need a really cheap meal.
Zucchini Fries
Prep Time: 20-30 min. Cook Time: 18-20 min. Servings: 4
Ingredients:
1/4 cup Progresso® panko bread crumbs
1/4 cup Progresso seasoned whole wheat bread crumbs
1/4 cup finely shredded Parmesan cheese
1 teaspoon seasoned salt
1 tablespoon basil, thyme and rosemary
1/2 teaspoon salt
1/4 teaspoon freshly ground pepper
2 tablespoons all-purpose flour
2 egg whites, beaten
1 1/2 lb zucchini
2 tablespoons butter, melted
1 cup salsa
Directions:
Preheat oven to 400F and spray a baking sheet with canola oil. Cut zucchini into fry size strips. Mix together Panko, bread crumbs, herbs, salts and pepper. In another bowl beat the egg whites and place the flour in a third bowl. Line them up flour, eggs and crumb mixture. Roll the zucchini and the snap peas in the flour, dip in the eggs and roll in the crumb mixture. Place on baking sheet. Sprinkle with the melted butter. Bake for 18 to 20 minutes or until brown. Serve with salsa.
Review:
I had made these in the hopes I could trick the girls into eating some vegetables. That totally failed. They saw right through that breading to the zucchini underneath. However, I thought these were great! I'm not a huge fan of zucchini honestly but these were really tasty. I would not recommend making these during the week if you work as the prep work takes a long time. Make these when you have more time to spend on the dipping and coating of each fry.
Dipping them in salsa wasn't bad but I actually liked dipping them in Six Sister's recipe for Utah's Pink Fry Sauce better.
This week I bring you Easy Garlic Chicken and Zucchini Fries. Both recipes come courtesy of Pinterest.
Easy Garlic Chicken:
| haha...you can see my feet |
Ingredients:
4 boneless skinless chicken breasts
4 garlic cloves, minced
4 Tbs. brown sugar
3 tsp. olive oil
Directions:
Preheat oven to 500 degrees. Lightly grease a casserole dish. In a small saute pan, saute the garlic in the oil until tender. Remove from heat and stir in brown sugar. Place chicken in casserole dish and cover with the garlic and brown sugar mixture. Add salt and pepper if desired. Bake uncovered for 15-30 min. (we baked ours for 20).
Nutrition:
Calories: 221
Fat: 6.4 g
Carbohydrates: 14.5 g
Fiber: 0 g
Protein: 25 g
Review:
Well the chicken was very easy to make and I love that we really didn't even have to buy anything for this recipe considering we keep all 4 ingredients on hand at our house. However, it was lacking in flavor a bit for me. The chicken was juicy enough but it was kind of bland. I'm pretty sure when we eat the leftovers tonight I will be adding some BBQ sauce to mine. I'm not sure we will be making this again, unless we are in a bind or need a really cheap meal.
Zucchini Fries
Prep Time: 20-30 min. Cook Time: 18-20 min. Servings: 4
Ingredients:
1/4 cup Progresso® panko bread crumbs
1/4 cup Progresso seasoned whole wheat bread crumbs
1/4 cup finely shredded Parmesan cheese
1 teaspoon seasoned salt
1 tablespoon basil, thyme and rosemary
1/2 teaspoon salt
1/4 teaspoon freshly ground pepper
2 tablespoons all-purpose flour
2 egg whites, beaten
1 1/2 lb zucchini
2 tablespoons butter, melted
1 cup salsa
Directions:
Preheat oven to 400F and spray a baking sheet with canola oil. Cut zucchini into fry size strips. Mix together Panko, bread crumbs, herbs, salts and pepper. In another bowl beat the egg whites and place the flour in a third bowl. Line them up flour, eggs and crumb mixture. Roll the zucchini and the snap peas in the flour, dip in the eggs and roll in the crumb mixture. Place on baking sheet. Sprinkle with the melted butter. Bake for 18 to 20 minutes or until brown. Serve with salsa.
Review:
I had made these in the hopes I could trick the girls into eating some vegetables. That totally failed. They saw right through that breading to the zucchini underneath. However, I thought these were great! I'm not a huge fan of zucchini honestly but these were really tasty. I would not recommend making these during the week if you work as the prep work takes a long time. Make these when you have more time to spend on the dipping and coating of each fry.
Dipping them in salsa wasn't bad but I actually liked dipping them in Six Sister's recipe for Utah's Pink Fry Sauce better.
Wednesday, July 11, 2012
Tuesday Temptations (a day late)
I know what you're thinking..."sheesh Joanna, you're only a week into this new weekly feature and you're already late??" Yesterday ended up being a rather busy day once we saw the sign outside our neighborhood saying there was going to be a neighborhood-wide garage sale on Saturday (and this is the 2nd year in a row we had not been notified but that vent is for another time). Anyway, I did not forget and I knew what 2 recipes I would be reviewing for a few days now.
First up, another recipe from Pinterest. I'll link to the actual blog, not the pin itself in case someone out there still isn't on Pinterest (and seriously why aren't you?).
So I know what you're thinking...Kale chips? Really? Those were my thoughts but all the comments under the pin swayed me to try them. And anyone who knows me, should know that I love chips. Like seriously love, would eat them every single day of my life if I could, love. So I thought, why not try to make a healthy alternative.
Kale Chips (no picture for this one as I forgot to take one)
Prep Time: 5 min. Cook Time: 12-15 min. Servings: Variable
Ingredients:
kale
1-4 Tbs. olive oil
sea salt (or other spices)
Directions:
Preheat oven to 375 degrees. Wash and THOROUGHLY dry your kale. Tear pieces of kale off the bunch, discarding the hard ribs in the middle. Line a cookie pan with tinfoil and spread your kale leaves out on top. Drizzle olive oil over leaves and lightly toss with your fingers for even distribution. Bake in oven 12-15 min. or until leaves are crispy (mine took 14 min.). Remove cooked leaves from oven and sprinkle with sea salt or other seasonings. Enjoy!
Nutrition:
I didn't bother calculating this one
Review:
So like I said earlier, I was pretty skeptical. However when I tried the first one fresh out of the oven, it was actually pretty good! So then I ate more and more and then actually felt sick from eating them. haha! I think I used too much olive oil. I used 2 Tbs. which coated the leaves really well. I think next time I might try just using an olive oil spray to see if they come out a bit lighter tasting.
Also, I could definitely tell which of the leaves were not all the way dry when I put them in the oven because those did not crisp up at all; ick. And definitely make sure none of the stem is on the leaf because that part is like chewing grass; double ick. So all in all, will these replace the salty goodness of regular potato chips? um no of course not, nothing can. BUT these will do to satisfy that crispy salty craving you might have late at night. (and bonus, I got my kale for $1.29 and only used half of it to make one batch so it seems pretty economical too)
And recipe 2 is Quick Chicken Lasagna from the Trim and Terrific Cookbook by Holly Clegg.
Prep Time: 10 min. Cook Time: 55 min. Servings: 8
Ingredients:
3 cups cooked, chopped chicken (or 2 large cans of chicken)
2 (26 oz) jars red pasta sauce
1 (8 oz) package no-boil lasagna noodles (also called oven-ready lasagna noodles)
2 cups shredded part-skim Mozzarella cheese
2 (10 oz) packages chopped spinach, thawed and drained
1 (4 oz) package crumbled goat cheese
Directions:
Preheat oven to 350 degrees.
Combine chicken with both jars of pasta sauce. In an oblong baking dish, spread a thin layer of the chicken sauce. Top with a layer of noodles, one-third of the chicken sauce, Mozzarella cheese, half the spinach, and one-third of the goat cheese. Continue with the remaining noodles, chicken sauce, Mozzarella, and goat cheese. Bake, covered, for 50 minutes. Uncover and bake 5 minutes longer, or until bubbly. Serve immediately.
Nutrition:
Calories: 462
Fat: 16
Carbs: 42
Fiber: 7
Protein: 36
Review:
I must say this recipe was really really good. I mean you can't go wrong with goat cheese! If you really don't like goat cheese, you could probably use feta or just leave it out completely but I think it added a nice flavor. Another plus was how easy this was to put together. The only reason it took me 10 minutes was because I had to keep checking the recipe to make sure I was getting the layers right. If you need more proof of the deliciousness of this recipe.....
Yes, that would be my 2 1/2 year old, a hater of all things vegetables and pasta, chowing down her lasagna. I was shocked. And I figured in true toddler form, she'd eat it the first night and refuse it the next. Not this one! Taylor gobbled up her leftovers the second night we had it as well. Now that's a good review!
First up, another recipe from Pinterest. I'll link to the actual blog, not the pin itself in case someone out there still isn't on Pinterest (and seriously why aren't you?).
So I know what you're thinking...Kale chips? Really? Those were my thoughts but all the comments under the pin swayed me to try them. And anyone who knows me, should know that I love chips. Like seriously love, would eat them every single day of my life if I could, love. So I thought, why not try to make a healthy alternative.
Kale Chips (no picture for this one as I forgot to take one)
Prep Time: 5 min. Cook Time: 12-15 min. Servings: Variable
Ingredients:
kale
1-4 Tbs. olive oil
sea salt (or other spices)
Directions:
Preheat oven to 375 degrees. Wash and THOROUGHLY dry your kale. Tear pieces of kale off the bunch, discarding the hard ribs in the middle. Line a cookie pan with tinfoil and spread your kale leaves out on top. Drizzle olive oil over leaves and lightly toss with your fingers for even distribution. Bake in oven 12-15 min. or until leaves are crispy (mine took 14 min.). Remove cooked leaves from oven and sprinkle with sea salt or other seasonings. Enjoy!
Nutrition:
I didn't bother calculating this one
Review:
So like I said earlier, I was pretty skeptical. However when I tried the first one fresh out of the oven, it was actually pretty good! So then I ate more and more and then actually felt sick from eating them. haha! I think I used too much olive oil. I used 2 Tbs. which coated the leaves really well. I think next time I might try just using an olive oil spray to see if they come out a bit lighter tasting.
Also, I could definitely tell which of the leaves were not all the way dry when I put them in the oven because those did not crisp up at all; ick. And definitely make sure none of the stem is on the leaf because that part is like chewing grass; double ick. So all in all, will these replace the salty goodness of regular potato chips? um no of course not, nothing can. BUT these will do to satisfy that crispy salty craving you might have late at night. (and bonus, I got my kale for $1.29 and only used half of it to make one batch so it seems pretty economical too)
And recipe 2 is Quick Chicken Lasagna from the Trim and Terrific Cookbook by Holly Clegg.
| mmmm looks good doesn't it? |
Ingredients:
3 cups cooked, chopped chicken (or 2 large cans of chicken)
2 (26 oz) jars red pasta sauce
1 (8 oz) package no-boil lasagna noodles (also called oven-ready lasagna noodles)
2 cups shredded part-skim Mozzarella cheese
2 (10 oz) packages chopped spinach, thawed and drained
1 (4 oz) package crumbled goat cheese
Directions:
Preheat oven to 350 degrees.
Combine chicken with both jars of pasta sauce. In an oblong baking dish, spread a thin layer of the chicken sauce. Top with a layer of noodles, one-third of the chicken sauce, Mozzarella cheese, half the spinach, and one-third of the goat cheese. Continue with the remaining noodles, chicken sauce, Mozzarella, and goat cheese. Bake, covered, for 50 minutes. Uncover and bake 5 minutes longer, or until bubbly. Serve immediately.
Nutrition:
Calories: 462
Fat: 16
Carbs: 42
Fiber: 7
Protein: 36
Review:
I must say this recipe was really really good. I mean you can't go wrong with goat cheese! If you really don't like goat cheese, you could probably use feta or just leave it out completely but I think it added a nice flavor. Another plus was how easy this was to put together. The only reason it took me 10 minutes was because I had to keep checking the recipe to make sure I was getting the layers right. If you need more proof of the deliciousness of this recipe.....
Yes, that would be my 2 1/2 year old, a hater of all things vegetables and pasta, chowing down her lasagna. I was shocked. And I figured in true toddler form, she'd eat it the first night and refuse it the next. Not this one! Taylor gobbled up her leftovers the second night we had it as well. Now that's a good review!
Monday, July 9, 2012
What Are You Doing on Saturday?
I'll tell you what you're doing! (or could be doing...I can't force you to do anything). This Saturday, July 14th, from 4-7 PM, our church will be hosting a FREE Family Day. What? Free? Family? Free? YES! There will be food, games, prizes, and inflatables. It's going to be held at Wiley Elementary School in Urbana. The idea of this is to reach out to the neighborhood surrounding Wiley and the families of Wiley students. But even if you don't attend Wiley, live in that neighborhood, or attend our church, you can still come. Believe me, we're not checking IDs at the door. ;)
So to recap:
What: Trinity Lutheran Family Day
When: July 14th, 4-7 PM (rain date scheduled for July 15th, same time)
Where: Wiley School Elementary in Urbana
Who: You and your family
Cost: FREE FREE FREE!
Walker, the girls, and I hope to see many of our friends there!
So to recap:
What: Trinity Lutheran Family Day
When: July 14th, 4-7 PM (rain date scheduled for July 15th, same time)
Where: Wiley School Elementary in Urbana
Who: You and your family
Cost: FREE FREE FREE!
Walker, the girls, and I hope to see many of our friends there!
Tuesday, July 3, 2012
Tuesday Temptations
I've mentioned in other posts how much I love Pinterest and one of the main reasons is all the great recipes I find. I think my recipes board is one of my biggest boards! We usually end up trying at least 1 new recipe every week and I thought I would share the results with my readers. Not all of the recipes will be directly from Pinterest. We do have many cookbooks in the house and sometimes we will try recipes from those that we have never had. Anyway, the point is I am going to try (providing I remember) to post a new recipe every Tuesday. Nothing special about Tuesdays; it just kind of worked for a clever title. As soon as our desktop computer is up and running again I will probably come up with some cute graphic for my "Tuesday Temptations" but until then, just imagine a pretty title at the top.
So for my first edition, I bring to you a recipe for Skinny Pool-Side Dip:
Prep Time: 5-10 min. Cook Time: 0 min. Servings: Approx. 16 (2 tbs. each)
Ingredients:
16 oz fat-free or reduced-fat cream cheese, softened (obviously fat-free would be less calories but it is more expensive)
1 red bell pepper, chopped
2 jalepenos, unseeded and chopped (I just used a can of diced jalepeno; worked great!)
1 can of corn, drained
1/2 can diced black olives
1 packet ranch dressing mix
Directions:
Using a hand mixer, blend the cream cheese with the ranch dressing mix. Stir in pepper, jalepenos, corn, and olives. Serve with crackers.
Nutrition Info: (calculated using SparkPeople's Recipe Calculator...take it as an estimate)
Calories: 94.5
Fat: 5.8 (I used reduced fat-cream cheese, not fat-free)
Carbs: 7.8
Fiber: .8
Protein: 3.9
Review
This dip is super easy to make and very tasty. Honestly I'm not sure how accurate the nutritional information is; I guesstimated on how many servings it actually makes. I figured there's 16 tablespoons in 8 oz and I used 16 oz of cream cheese; but obviously the vegetables create more volume. So it's entirely possible that there's 20+ servings in this dip (assuming each serving is 2 tbs.). So if anything, there are actually less calories per serving than what I calculated. Hope you enjoy the dip!
So for my first edition, I bring to you a recipe for Skinny Pool-Side Dip:
| This is how mine turned out |
Prep Time: 5-10 min. Cook Time: 0 min. Servings: Approx. 16 (2 tbs. each)
Ingredients:
16 oz fat-free or reduced-fat cream cheese, softened (obviously fat-free would be less calories but it is more expensive)
1 red bell pepper, chopped
2 jalepenos, unseeded and chopped (I just used a can of diced jalepeno; worked great!)
1 can of corn, drained
1/2 can diced black olives
1 packet ranch dressing mix
Directions:
Using a hand mixer, blend the cream cheese with the ranch dressing mix. Stir in pepper, jalepenos, corn, and olives. Serve with crackers.
Nutrition Info: (calculated using SparkPeople's Recipe Calculator...take it as an estimate)
Calories: 94.5
Fat: 5.8 (I used reduced fat-cream cheese, not fat-free)
Carbs: 7.8
Fiber: .8
Protein: 3.9
Review
This dip is super easy to make and very tasty. Honestly I'm not sure how accurate the nutritional information is; I guesstimated on how many servings it actually makes. I figured there's 16 tablespoons in 8 oz and I used 16 oz of cream cheese; but obviously the vegetables create more volume. So it's entirely possible that there's 20+ servings in this dip (assuming each serving is 2 tbs.). So if anything, there are actually less calories per serving than what I calculated. Hope you enjoy the dip!
Saturday, June 23, 2012
Holy Crap, It Worked!
All those who love cleaning their shower, raise your hand! I'm assuming none of you shot your hand enthusiastically into the air which means you're like me. Cleaning the shower is not a task you enjoy. And when I don't enjoy something, guess what? I don't do it that often (big surprise). Therefore, our shower does not get cleaned all that often which leads to this:
I know...so gross. And believe me, I have tried everything to get rid of that nasty ring around the shower. The scrubbing bubbles I had clearly did not actually scrub like their animated counterparts on TV. Ka-boom was more like a Ka-blah. Tilex, Pinesol, Comet...nothing worked!
Then last week I saw this pin that claimed with some vingar and some Dawn, your soap scum would be gone! (haha I totally rhymed and I didn't mean to). Yes the blogger had before and after pictures but I still was kinda skeptical. I've had other pins disappoint me. But today I thought I'd give it a try. Now the blogger wasn't very specific in her directions so I just kinda eyeballed how much to use of each. I liberally sprayed it on all the gunky spots in the shower, set the timer and waited. I was so excited to see if this worked that I actually cleaned other parts of my house while I was waiting (did I just say I was excited about cleaning? what is wrong with me?!?)
While I was waiting I did look at the post again and realized she did link to the original blog post she had gotten the idea from (you do see what we're doing here.....creating a blog post link chain of the same idea) so I went to that blog that had more specific directions. The girl on there heated her vinegar first. Well, crap I didn't do that. She also left it on for 2 hours, not one. Well I wasn't going to do that either. So when the timer went off, I was quite worried that maybe it wouldn't work after all since I had not followed the original directions. Well here is the after:
Oh yes, I supersized that picture so you could see that all the nastiness is gone! There are a few specks that are still kinda stuck and a spot on one of the shelves that needs some tougher elbow grease but for the most part, all of the grime wiped away easily with a wet rag. Then I ran the shower on super hot for a few minutes to wash down all of the vinegar/Dawn solution.
So how can you make this magic happen in your house?
What you'll need:
one spray bottle
vinegar (apparently there is cleaning vinegar at Wal-mart near the multipurpose cleaners, I just used regular distilled white vinegar)
Dawn (original blue bottle)
What you do:
You'll want to mix equal parts vinegar and Dawn, so that's a 1 to 1 ratio. If you're bad with ratios, that means if you use 1 cup of Dawn, use 1 cup of vinegar. But, before you mix them heat the vinegar first. I honestly don't know if you absolutely have to do this (as it worked for me when I didn't heat it) but it might be more powerful if you do (again, I don't know. I'm not a chemistry person). Put your vinegar and Dawn in a spray bottle and shake gently to mix them.
Spray whatever you want to get clean. I used a LOT (as in almost the whole spray bottle) to do the shower but mine was pretty grimy (remember? Scroll up if you don't). Set your timer for an hour. If you think your tub/shower is worse than mine then maybe set your timer for 2 hours.
When the timer goes off, use a wet rag to wipe (and scrub a bit) the grime away. Rinse area with hot water. Stand back and admire your clean tub! (and then vow to never let it get that dirty again)
I will warn you that you will probably want to stay out of the bathroom while you're letting the solution soak because it stinks to high heaven. But once you rinse all of the solution away, the smell will disappear too.
I know...so gross. And believe me, I have tried everything to get rid of that nasty ring around the shower. The scrubbing bubbles I had clearly did not actually scrub like their animated counterparts on TV. Ka-boom was more like a Ka-blah. Tilex, Pinesol, Comet...nothing worked!
Then last week I saw this pin that claimed with some vingar and some Dawn, your soap scum would be gone! (haha I totally rhymed and I didn't mean to). Yes the blogger had before and after pictures but I still was kinda skeptical. I've had other pins disappoint me. But today I thought I'd give it a try. Now the blogger wasn't very specific in her directions so I just kinda eyeballed how much to use of each. I liberally sprayed it on all the gunky spots in the shower, set the timer and waited. I was so excited to see if this worked that I actually cleaned other parts of my house while I was waiting (did I just say I was excited about cleaning? what is wrong with me?!?)
While I was waiting I did look at the post again and realized she did link to the original blog post she had gotten the idea from (you do see what we're doing here.....creating a blog post link chain of the same idea) so I went to that blog that had more specific directions. The girl on there heated her vinegar first. Well, crap I didn't do that. She also left it on for 2 hours, not one. Well I wasn't going to do that either. So when the timer went off, I was quite worried that maybe it wouldn't work after all since I had not followed the original directions. Well here is the after:
Oh yes, I supersized that picture so you could see that all the nastiness is gone! There are a few specks that are still kinda stuck and a spot on one of the shelves that needs some tougher elbow grease but for the most part, all of the grime wiped away easily with a wet rag. Then I ran the shower on super hot for a few minutes to wash down all of the vinegar/Dawn solution.
So how can you make this magic happen in your house?
What you'll need:
one spray bottle
vinegar (apparently there is cleaning vinegar at Wal-mart near the multipurpose cleaners, I just used regular distilled white vinegar)
Dawn (original blue bottle)
What you do:
You'll want to mix equal parts vinegar and Dawn, so that's a 1 to 1 ratio. If you're bad with ratios, that means if you use 1 cup of Dawn, use 1 cup of vinegar. But, before you mix them heat the vinegar first. I honestly don't know if you absolutely have to do this (as it worked for me when I didn't heat it) but it might be more powerful if you do (again, I don't know. I'm not a chemistry person). Put your vinegar and Dawn in a spray bottle and shake gently to mix them.
Spray whatever you want to get clean. I used a LOT (as in almost the whole spray bottle) to do the shower but mine was pretty grimy (remember? Scroll up if you don't). Set your timer for an hour. If you think your tub/shower is worse than mine then maybe set your timer for 2 hours.
When the timer goes off, use a wet rag to wipe (and scrub a bit) the grime away. Rinse area with hot water. Stand back and admire your clean tub! (and then vow to never let it get that dirty again)
I will warn you that you will probably want to stay out of the bathroom while you're letting the solution soak because it stinks to high heaven. But once you rinse all of the solution away, the smell will disappear too.
Subscribe to:
Posts (Atom)